The easiest way to fit a Christmas village into a small space is to give it one surface and set the houses out in a short row instead of a town square. A mantel, a narrow console, one bookshelf, a tray you can lift off the coffee table: pick a spot, put out the cottages you love most, and leave the rest in the box until next year. A few glowing houses and some bottle-brush trees feel cozier than a crowded table anyway.
7 Christmas Village Display Ideas for Small Spaces
Last updated:
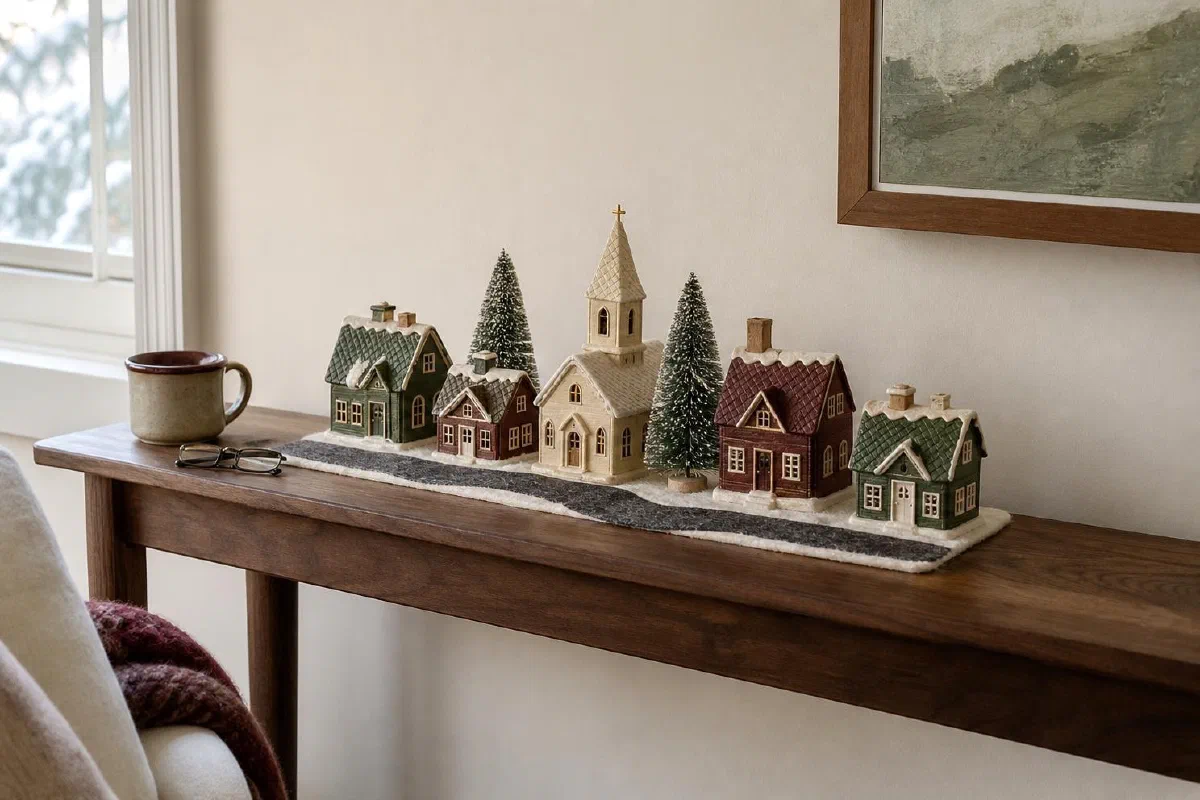
Styling idea, not a photograph of the linked products.
Some links on this page are Amazon affiliate links. If you buy through them, Etheric Echoes earns a small commission at no extra cost to you.
For the whole house, not only the village, see our small-space Christmas decor guide.
The seven spots below are the mantel, a console table, a bookshelf, a tiered stand, the floor under the Christmas tree, a tray, and a windowsill or ledge. After them you will find snow, hidden cords, scale, and a short list of what to buy.
Which spot fits which tight space?
Pick the row that looks most like your room. This table follows The Momentree’s small-space guide, with our own spot numbers where they match.
| Tight spot | Layout idea | Why it works | Try this |
|---|---|---|---|
| Windowsill | One row of mini houses on a low garland | Uses the ledge you already have, and daylight shows the paint | A mirror nearby amplifies the glow at night |
| Corner wall | Staggered floating shelves | Builds height where traffic is light | Taller pieces up high, faux snow to tie it together |
| Mantel | A narrow scene with layered heights | Already a focal point, no extra furniture | Balance left and right with one hero building in the center |
| Entry console | A slim runner and a mini village welcome | Greets guests without blocking the path | A battery tea light behind the buildings adds depth |
| Above the cabinets | Lightweight pieces along the cabinet tops | Uses dead space and can be seen across the room | Keep figures larger so they read from far away |
| Bookcase shelf | A shelf street | Keeps the decor contained | Risers or stacked books vary the building heights |
| Bar cart | A two-tier rolling scene | Compact, and you can roll it away for a party | Buildings on the top tier, accessories below |
Two numbers worth keeping: about 2 inches around each base for a close-knit town, and about 9 inches of shelf clearance, which is what most houses in one Creative Shour hutch display needed, so the taller ones go on the top shelf.
How do you display a Christmas village in a small space?
Three habits do most of the work, whichever spot you pick.
- Measure before you unpack. For a close-knit town, measure the base of each house and add about two inches around it. LoveToKnow’s village guide says a spread-out countryside needs six to eight inches around each one, which is why a small space wants the close-knit version.
- Start with the houses that plug in, then build outward. Set them down first so you know the cord reaches, then your biggest cottage or the church as the focal point. Smaller houses fill in around them.
- Lift the back row and leave a lane. Houses on one flat line look like a shelf of ornaments. A little height at the back and a gap down the middle that looks like a street makes it read as a village.
1. Line the village along the mantel
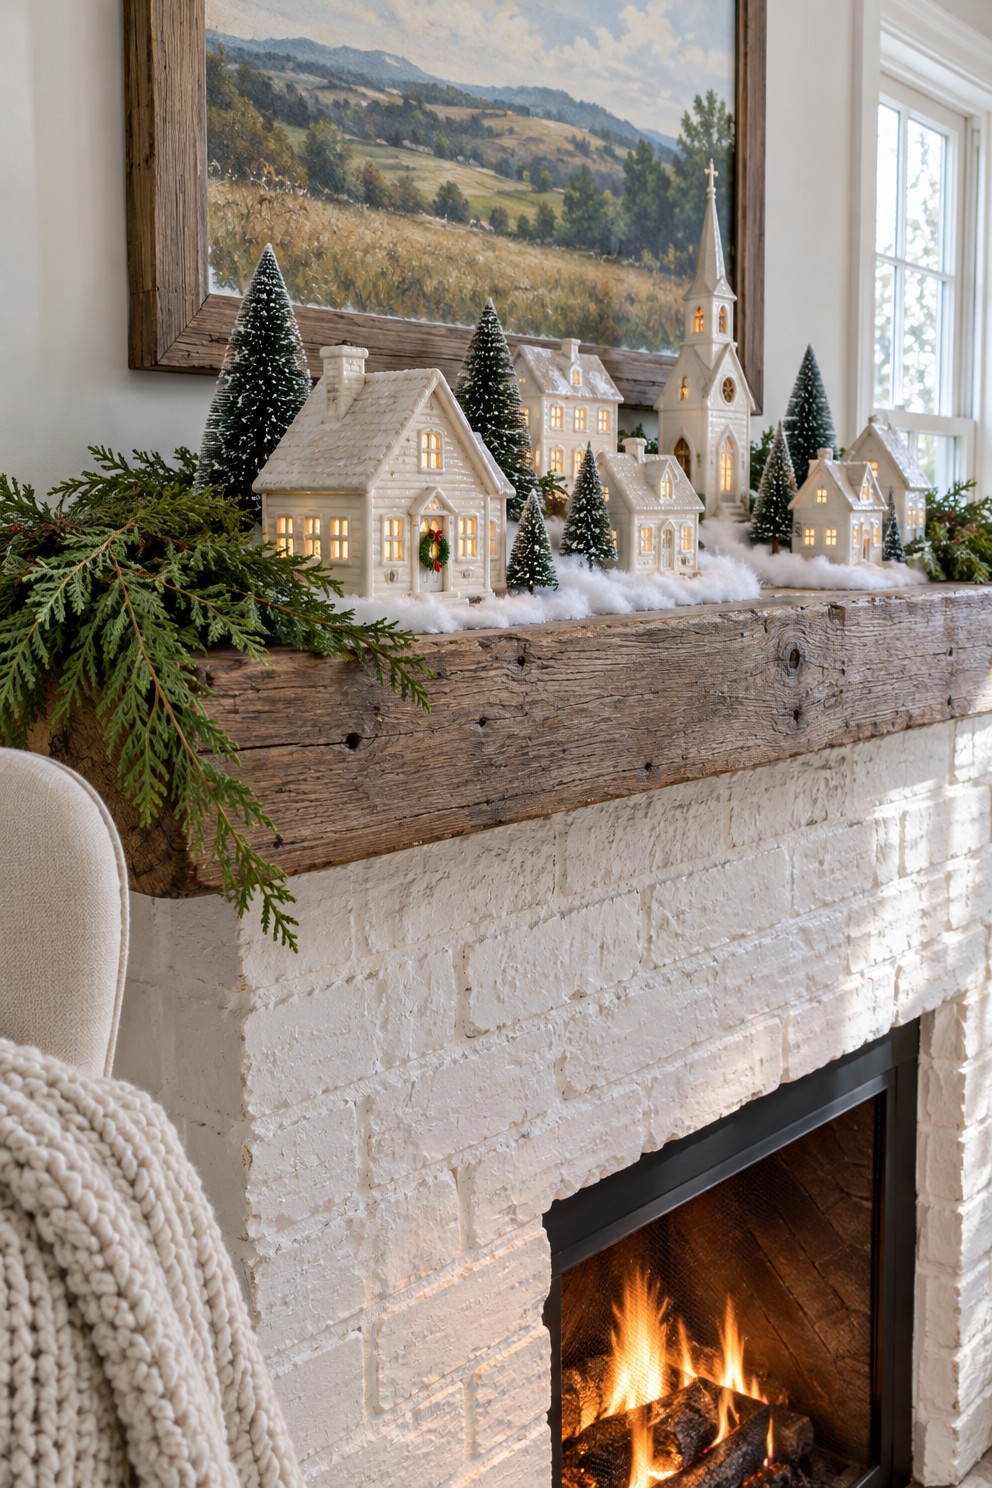
A fireplace mantel is the classic spot because it gives you height, light and a backdrop in one stroke. Lay evergreen sprigs or a thin layer of snow along the shelf, set the taller houses toward the back and the small ones in front, and leave a narrow gap in the middle for a lane. Bottle-brush trees (this 30-piece set (opens Amazon in a new tab)As an Amazon Associate, we earn from qualifying purchases. Full disclosure. runs 2.3 to 5.2 inches) go between the cottages, and a strand of warm fairy lights tucked behind the row makes the windows look brighter.
No fireplace? A floating shelf or the top of a sideboard does the same job. A small wreath hung above the row finishes it.
2. Make one street on a console table
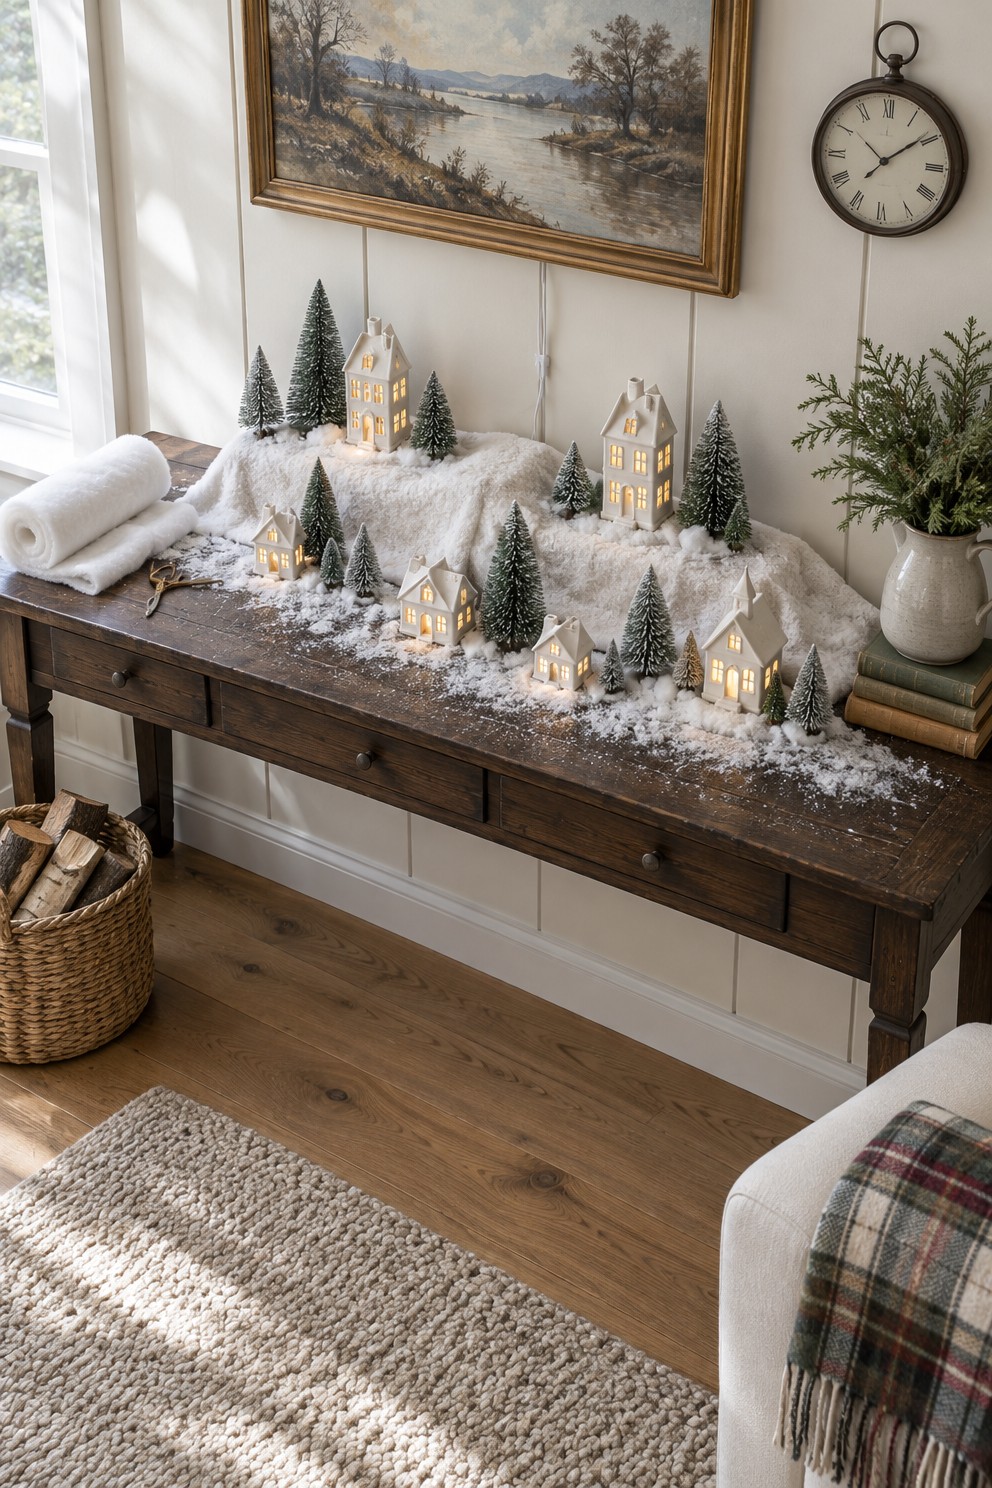
A console or entry table is the first thing anyone sees when they walk in, so a row of lit houses there feels like a welcome. Put a plain runner down first, then stack a few books or wooden risers under it to make small hills. Keep it to one row, with the biggest house in the middle and a tree at each end. Pinecones and cedar sprigs between the houses add texture without taking more room.
If the table is shallow, choose your smaller houses and keep the tall ones at the ends of the row.
3. Give the village a shelf or two on the bookshelf
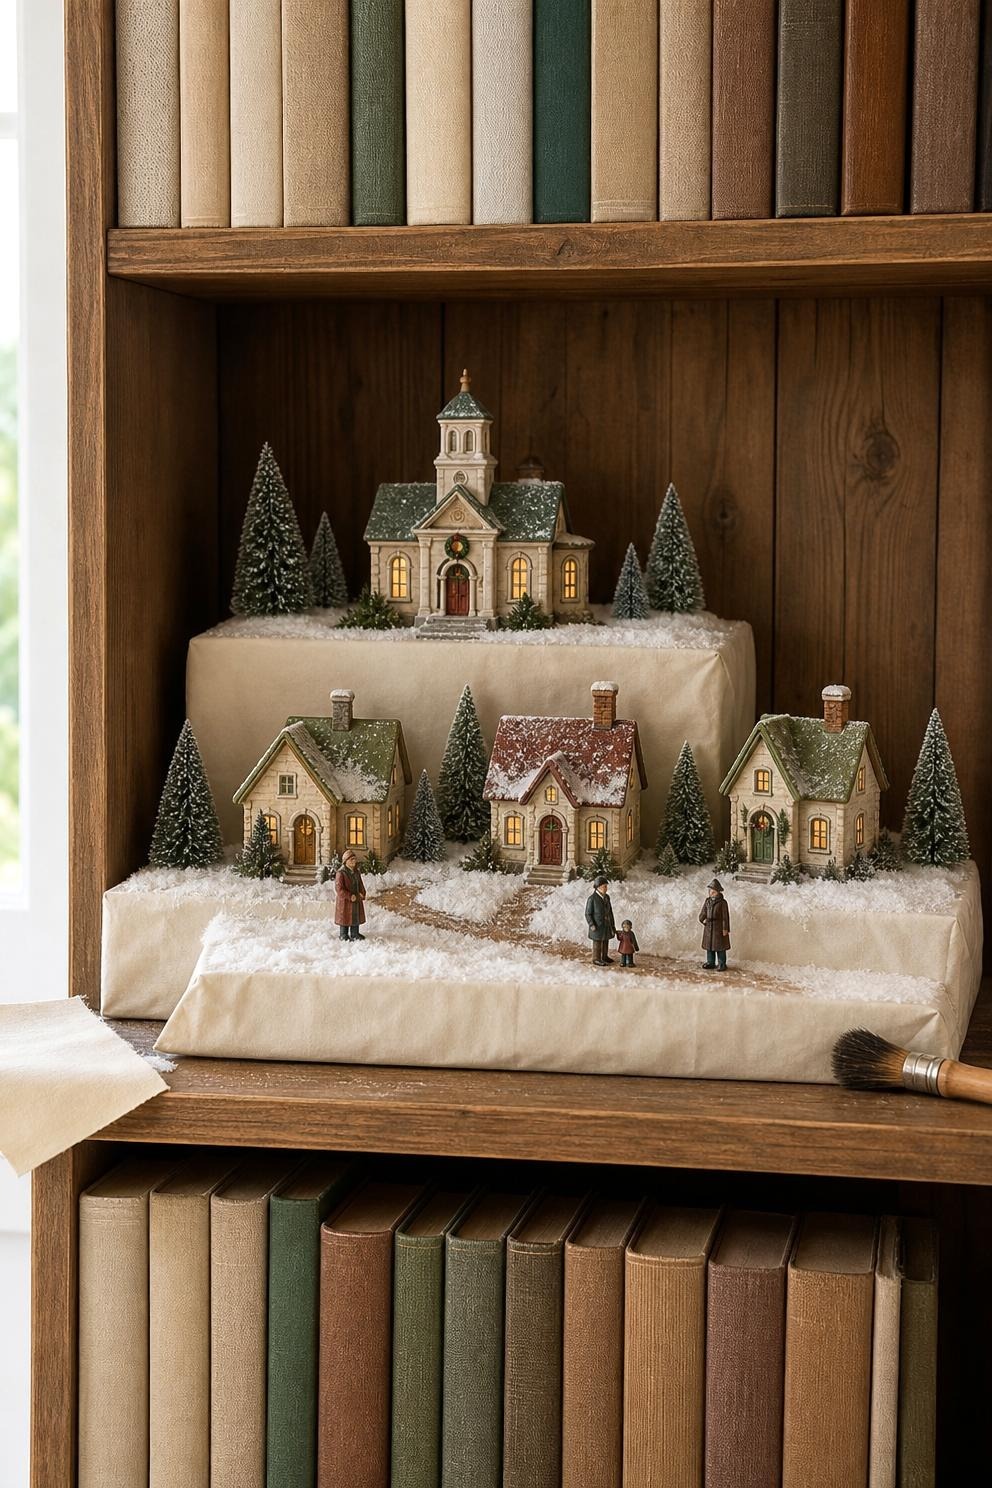
A bookshelf or bookcase already divides itself into neighborhoods. Put a shop row on one shelf and two cottages with trees on another, and leave the other shelves for books so the furniture still looks like yours. A tiny wreath or a string of battery lights along the edge makes it look planned instead of piled.
4. Stack it on a tiered stand
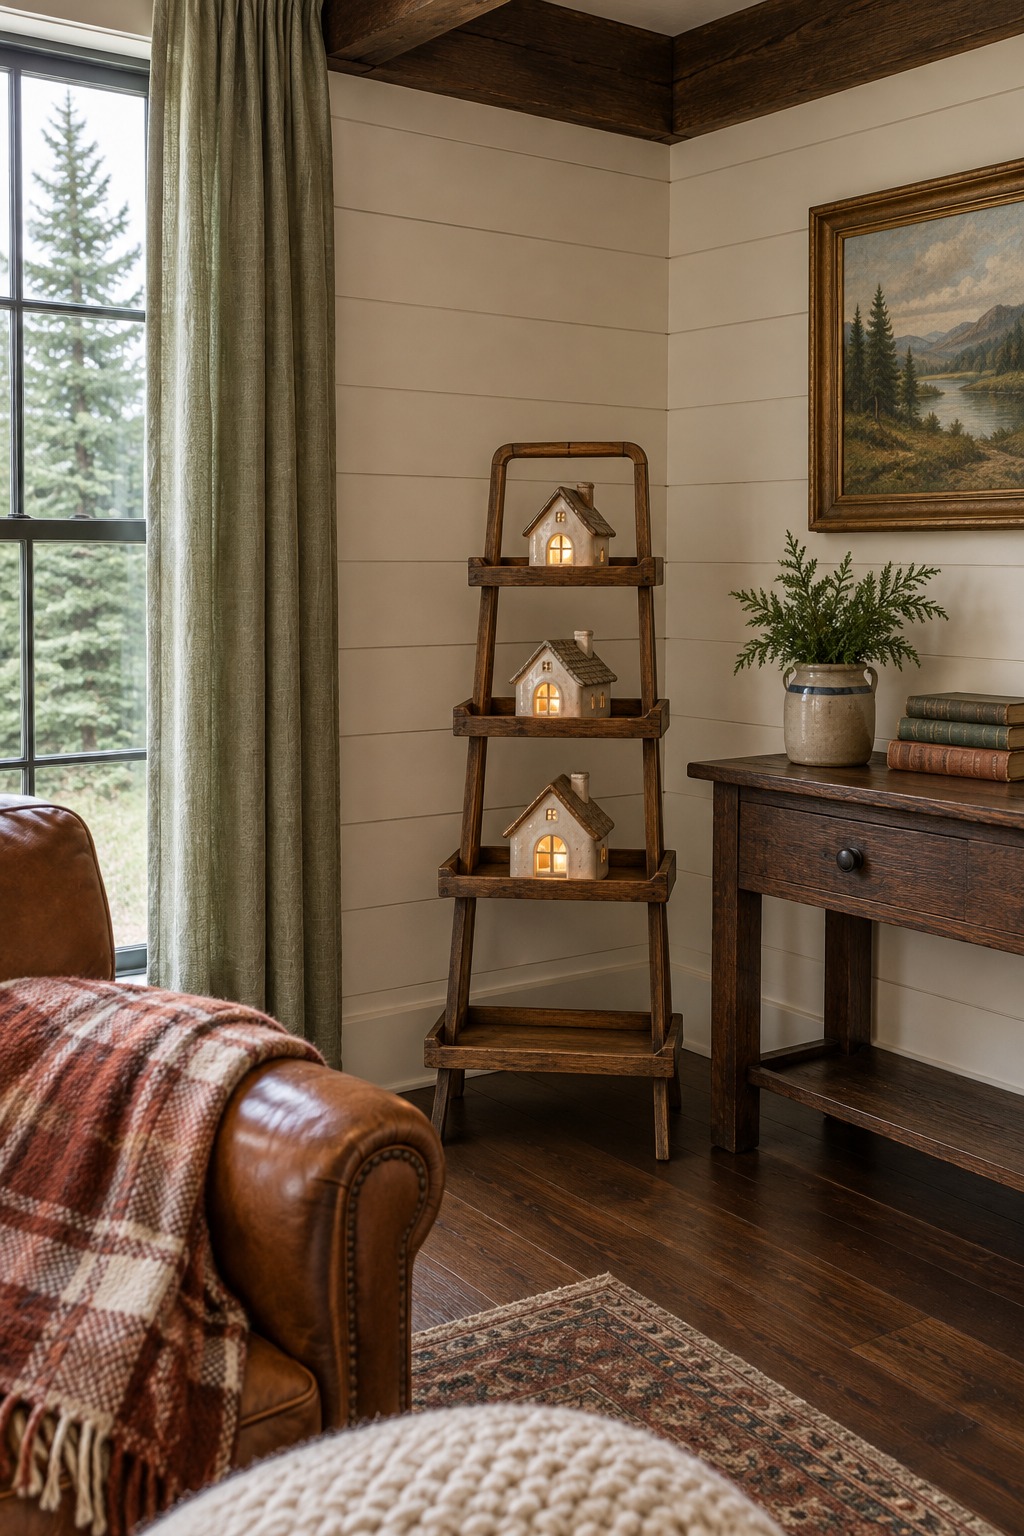
A three-tier wooden stand puts several houses in the floor space of one. This wood three-tier stand (opens Amazon in a new tab)As an Amazon Associate, we earn from qualifying purchases. Full disclosure. is listed at 13.46 inches long, 7 wide and 16.57 tall, which is narrow enough for a corner. Set it in a corner beside a chair, with the heaviest cottage on the bottom tier so it stays steady. Give each level its own small scene, a church and trees at the top and two cottages with a few figurines below. A strip of red or green velvet ribbon under the houses covers the bare wood.
5. Tuck a low village under the Christmas tree
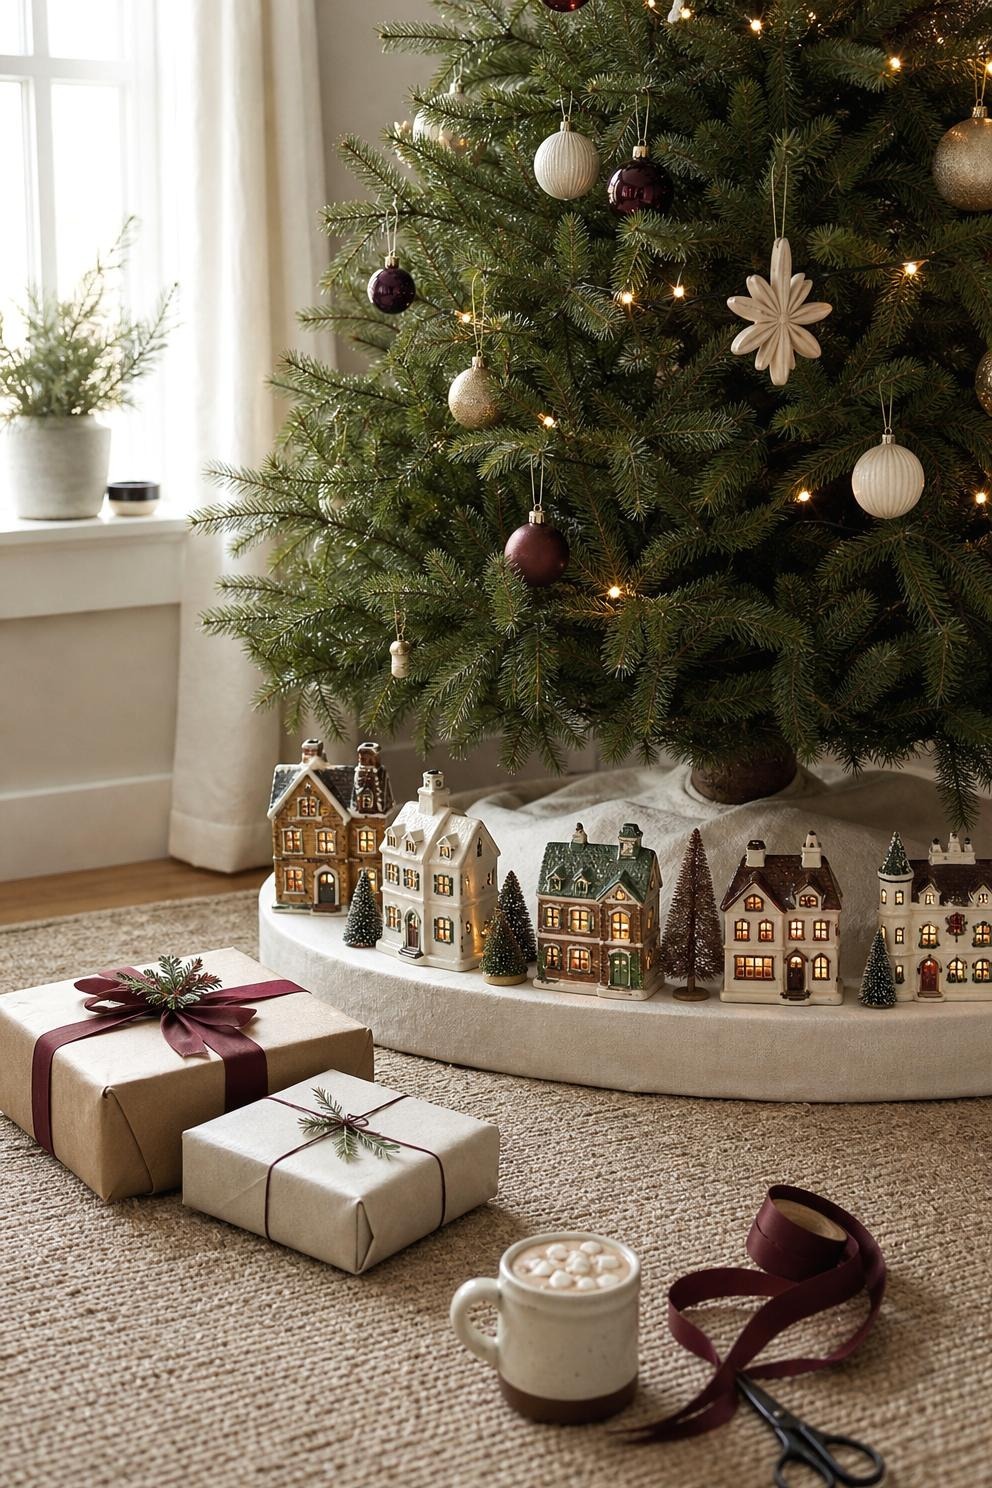
This is the old-fashioned way. Before tree skirts were a thing, many families built the whole village around the base of the tree, and the tree lights spilling down over the rooftops are hard to beat. Build it on a flat white base, like a snow blanket laid over a piece of cardboard, so the houses sit level on a soft tree skirt. Choose low cottages, and leave room to water a live tree and a clear path to the presents.
6. Move it onto a tray or a dough bowl
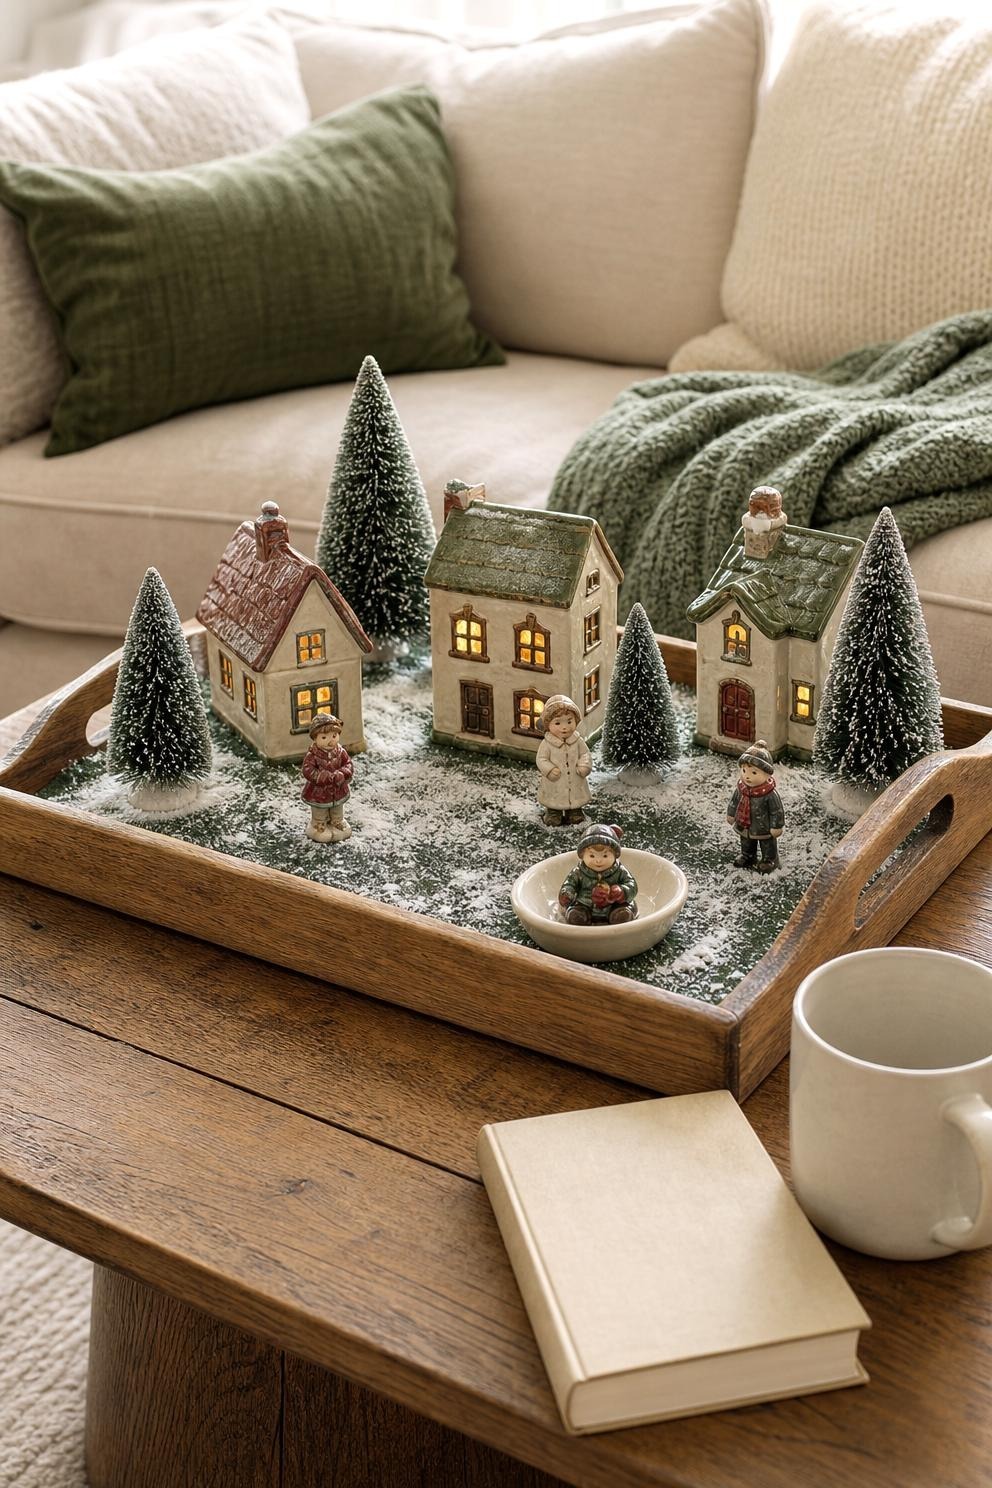
A tray is the best answer for a coffee table or dining table you need back every day. Line a wooden tray or a big dough bowl with snow or moss, set three to five houses in it, and weave a strand of fairy lights through the middle. When dinner is on, lift the whole thing off and set it on a counter or sideboard. A prop stylist quoted by the Associated Press does the same thing with a large platter lined with fake snow and fresh evergreen branches around the village.
It also works on a kitchen counter. One or two houses and a few trees beside the coffee maker is a small thing you notice every morning.
7. Use a windowsill or a picture ledge for tiny houses
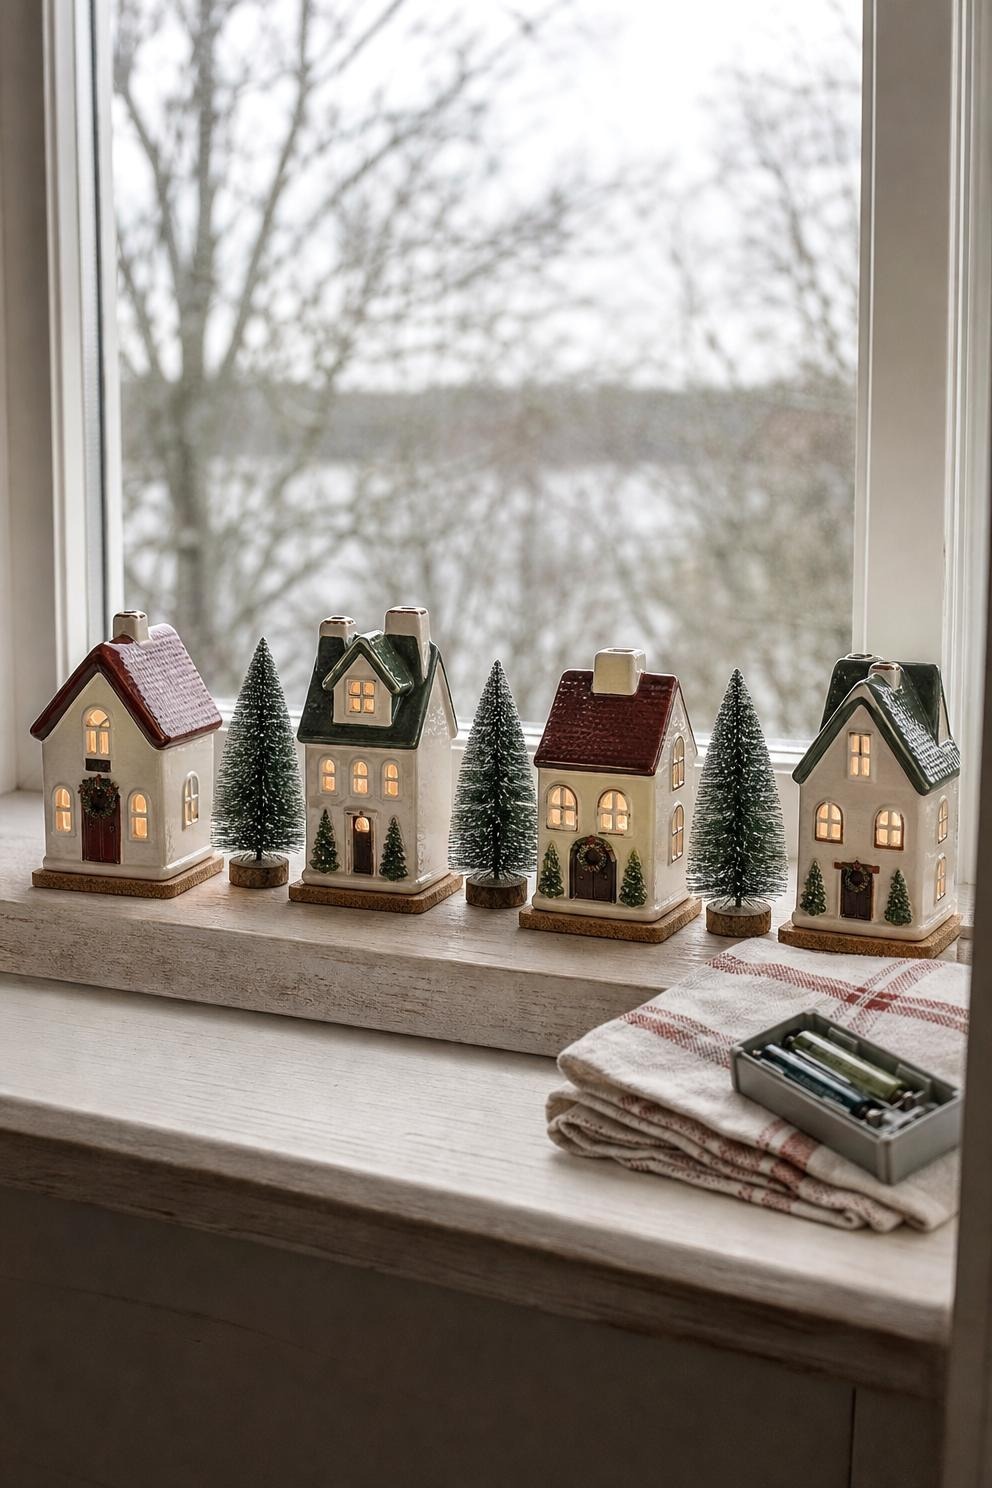
If the sill is deep enough for the whole base of each house, it is a good place for a few small ones. Measure the deepest house, not just the trees. Daylight shows off the painted details, and the little windows glow at dusk. A picture ledge or a floating shelf is shallower, so use small pieces and trees there. A row of unlit miniatures looks sweet in daylight, and a lamp across the room lights them in the evening.
More small-space spots: cloche, cabinet and ledge
Three more places to try when the first seven do not fit your room.
A glass cloche or shadow box
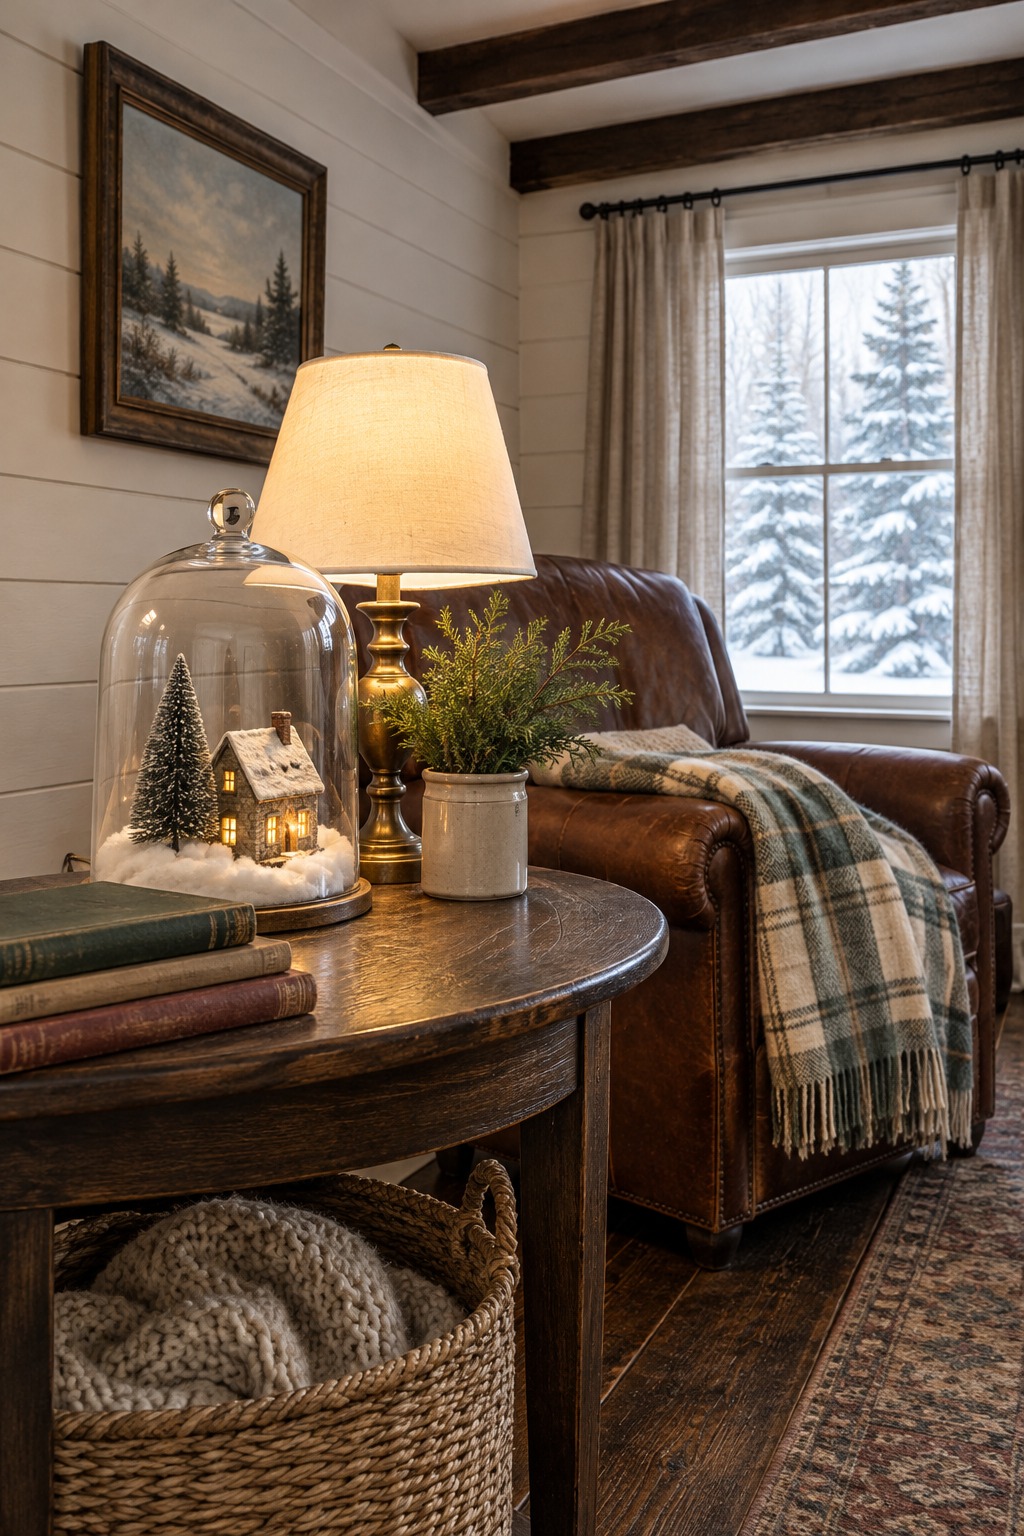
Put one cottage, a bottle-brush tree and a dusting of faux snow under a glass cloche (this one (opens Amazon in a new tab)As an Amazon Associate, we earn from qualifying purchases. Full disclosure. is 10.5 inches tall with a 9.5 by 5.4 inch interior), or hang a small scene in a wall shadow box. It keeps a favorite piece contained and out of reach of curious hands, and it takes about the room of a vase.
Above the kitchen cabinets or inside a curio cabinet
LoveToKnow lists the top of kitchen cabinets, when there is space between the cabinets and the ceiling, as a place for a village. A glass-front or curio cabinet works the same way and keeps the pieces away from pets and children. Use larger figures on top of a cabinet so they read from across the room, as The Momentree suggests.
A floating wall ledge
A narrow picture ledge or floating shelf lined with faux snow or a pine garland holds a few small houses and bottle-brush trees along a wall, with no floor space used. Stagger two or three ledges in a corner to build height.
Hidden corners: one cottage on a nightstand
Some of the best displays are the quiet ones. A single glowing cottage on a nightstand, a small post office on the bathroom shelf, or a snowy church beside your reading chair gives you a Christmas village without giving up any furniture. If your collection is bigger than your room, split it into small scenes around the house this way instead of building one town.
What scale are most Christmas villages?
There is no single scale. Department 56 says there is no definite scale to its villages. Collectors tell the company that The Original Snow Village comes closest to O scale, and that its Heritage Village lines (Dickens’, Christmas in the City, North Pole, Alpine Village and New England Village) come closest to HO scale. If you want to add a train, the same Department 56 FAQ says the scale you choose is up to you.
The figures often look small next to the buildings, and that is normal. Department 56 explains that ceramic shrinks about 5 to 15 percent when it is fired, and the figures are made small enough to keep details like a shawl’s folds.
So mixing is fine. Pick a color family, all white or red and green or natural wood, and let the houses from different makers sit together. As one village blogger puts it, don’t stress over whether everything matches. Just pick a beautiful home and begin.
What are good themes for a small Christmas village?
A theme helps a small display hold together. These four work well when you only have a few pieces.
- All white: ceramic cottages, snow and silver trees, calm in a cream room.
- Red and green: the traditional look, with a bit of plaid underneath.
- Rustic wood: wood slices, pinecones and evergreen, with small wooden houses.
- Alpine: wooden A-frame houses, a few trees and little else.
How do you make a Christmas village display?
You can build a good one for the price of a bag of batting, with no DIY skills. Here is how it goes together in a small space.
Snow and ground cover
White cotton batting, a plain white sheet, a snow blanket or soft white fleece all work as ground. A sheet looks the most natural, and batting looks the fluffiest. Lay it down first, then set the houses on top. Sprinkle a little fake snow after, and a pinch of silver or gold glitter mixed in gives the roofs a frosty shine. Tuck the edge of the fabric behind the back row so you can’t see where the surface ends.
Lift the back row with what you have
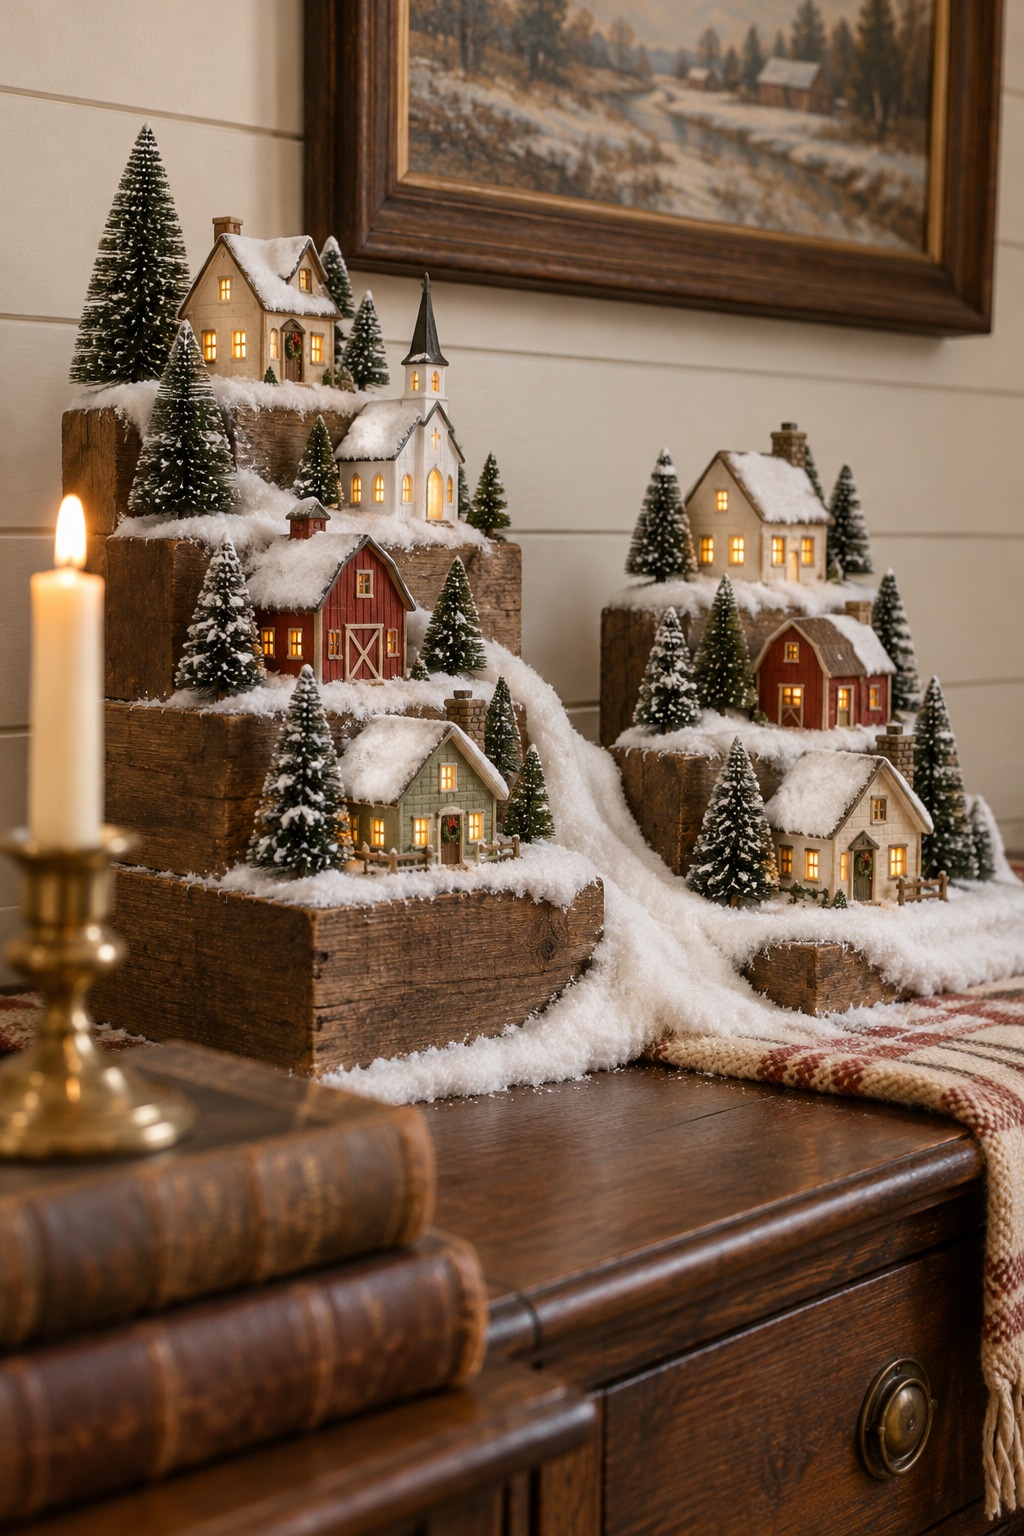
Set two or three boxes against the wall at the back (or two sets of wooden tiered risers (opens Amazon in a new tab)As an Amazon Associate, we earn from qualifying purchases. Full disclosure., if you want a hill that looks planned), then drape a white throw over them. Tuck one side between the wall and the boxes to hold it, and let the rest fall toward the front. You end up with a snowy hill that took no tools. Smaller houses can sit on a soup can, a block of wood or a box hidden under the snow. Wrapped in gift paper, a box looks like a present.
Hide the cords
A flat-plug power strip lets a console sit close to the wall, and the thin cord runs out behind it. For a small row, you can skip cords altogether. A battery tea light tucked behind a building adds depth, and a mirror nearby amplifies the glow at night. Remote-control tea lights, the flameless candle kind, are battery powered and can sit inside houses that have an open bottom. Turn the whole scene off when you leave the house or go to bed.
Where can you find Christmas village pieces on a budget?
You do not need a whole set to begin. The end of the season is when the houses go on sale, and craft stores often carry pieces in a similar style and size. Yard sales and thrift stores have older ceramic ones. One long-time village collector says her family bought houses at half price at the end of each season.
If you are short on room, spend on accessories before buildings. They are cheaper, and in a small display they do a lot of the work. People and animals doing something give it life: someone on a bench, a skater, a dog by a lamppost.
What are the best Christmas village sets to collect?
Department 56 and Lemax are the two names that come up in most village guides. Department 56 has made ceramic houses since 1976. The best set is the one whose houses you want to see every evening, so pick by what you like looking at, not by what is popular. Starting with one house and adding a piece each year is how most collections grow.
What to buy
You do not need any of it to start, since a white sheet and the houses you already own will do. If one of these fills a gap in your setup, here is where to look. Cost tiers run from $ (least) to $$$ (most).
Lighted white ceramic village set, 5 houses and 9 trees (opens Amazon in a new tab)As an Amazon Associate, we earn from qualifying purchases. Full disclosure. ($$$). A starter set if you own nothing yet; the first pick in the box at the top. The listing says the houses run 4 to 8.6 inches tall and it comes with a remote. It is all white, so it suits a calm room and not a red-and-green one. Check how the lights are powered before you pick a spot.
JOYIN snow blanket roll (opens Amazon in a new tab)As an Amazon Associate, we earn from qualifying purchases. Full disclosure. ($). The listing gives two strips, each 15 inches wide and 10 feet long, which is the right width for a mantel or a console. Too narrow for a whole table.
Remote flameless LED tea lights, 12-pack (opens Amazon in a new tab)As an Amazon Associate, we earn from qualifying purchases. Full disclosure. ($). Each light is about 1.5 inches wide, so it only fits houses with an open bottom. Check yours before you buy.
Flat-plug power strip with a 5-foot cord (opens Amazon in a new tab)As an Amazon Associate, we earn from qualifying purchases. Full disclosure. ($). The plug is thin enough to sit behind a console. It has six outlets, which is more than a small row needs.
Acacia wood serving tray, 17 by 12 inches (opens Amazon in a new tab)As an Amazon Associate, we earn from qualifying purchases. Full disclosure. ($). Made for serving, which works as a village tray with its built-in handles. Room for three or four small houses.
Bottle-brush tree set, 30 pieces (opens Amazon in a new tab)As an Amazon Associate, we earn from qualifying purchases. Full disclosure. ($). Five sizes from 2.3 to 5.2 inches, to fill the gaps between houses.
Wood three-tier stand (opens Amazon in a new tab)As an Amazon Associate, we earn from qualifying purchases. Full disclosure. ($$). Listed at 13.46 by 7 inches and 16.57 inches tall, for the tiered-stand idea.
Wooden tiered risers, 2 sets (opens Amazon in a new tab)As an Amazon Associate, we earn from qualifying purchases. Full disclosure. ($$). Lift the back row without boxes.
Glass cloche with wood base (opens Amazon in a new tab)As an Amazon Associate, we earn from qualifying purchases. Full disclosure. ($$). 10.5 inches tall, with room inside for one cottage and a tree.
Department 56 Christmas at Grandma’s lit house (opens Amazon in a new tab)As an Amazon Associate, we earn from qualifying purchases. Full disclosure. ($$$). A single showpiece, 8.5 inches tall.
The scene photos show styling ideas, not these exact products. Availability was checked on October 21, 2026 and can change.
How do you lay out a Christmas village?
Follow six steps, adapted from LoveToKnow’s village guide.
- Decide the size. Count your houses and measure the base of each one, then add about 2 inches around it for a close-knit town.
- Choose the platform. A mantel, shelf or free table needs nothing built.
- Pick a theme. One look helps a small display hold together.
- Add the ground. Snow, batting or a white sheet goes down before the houses, or sprinkle fake snow after.
- Place the houses and accessories. You do not have to use every piece, and a lane down the middle makes it read as a street.
- Draw a simple map. Sketch the layout, keep it in the storage bin, and next year you can repeat it.
What can you use to display a Christmas village?
Almost any steady surface: a mantel, console, bookcase, tiered stand, tray or dough bowl, windowsill, picture ledge, floating shelf, a nightstand or the top of a cabinet. For a no-table display, shelves and ledges build up instead of out.
Make a plan before you unpack
Set it up in this order and it goes quickly.
- Clear the spot and lay down your snow base.
- Put the houses that plug in first, so the cords reach, then the biggest house.
- Fill in with the smaller houses, trees and figurines, and leave a lane.
- Tuck the lights and cords behind the back row.
- Step back and take away one piece. A village almost always looks better with a little room to breathe.
To sketch it first, use the Christmas village layout planner. Once you love the layout, take a few photos from different angles and keep them in the storage box. Next year you will know what you did.
Putting it away
Department 56 recommends storing village pieces somewhere between 50 and 80 degrees, away from an attic, in plastic bins so the boxes stay dry. Wrap each house on its own, and keep its light cord with it so you are not hunting for the right one in November. More packing ideas are in the small home Christmas decor and storage plan.
More small-space holiday ideas
- Christmas Mantel Decor Ideas for a Cozy Room
- Christmas Garland: How Much You Actually Need
- Christmas Wall Decor: 7 Ideas for a Small Home
- Small Space Christmas Tree Ideas
- Small Home Christmas Decor and Storage Plan
- Renter friendly Christmas decor with no nails
- Christmas bookshelf decorating ideas
Choose the spot that needs the fewest changes to your room. A short row you can leave up all holiday season is easier to enjoy than a big scene you have to work around every day.