
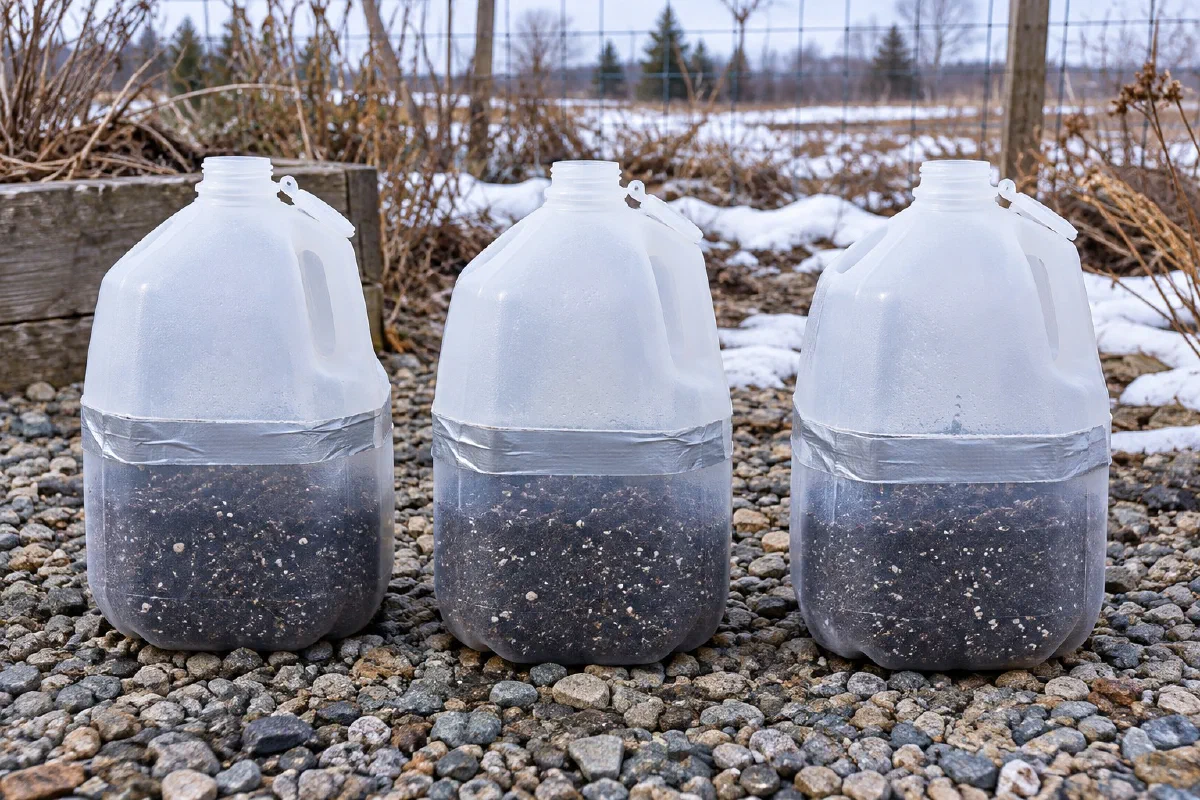
Winter sowing starts suitable seeds outdoors in ventilated recycled containers. It can supply the cold, moist conditions some perennial seeds need, without taking over an indoor shelf. It is not a guarantee that every flower will germinate or survive a freeze.
University of Minnesota Extension describes this method for native perennials and hardy annuals. Check the seed packet’s cold-treatment requirements and your local winter conditions before choosing a sowing date.
What You Need for Winter Sowing in Milk Jugs
| Item | Cost | Notes |
|---|---|---|
| Gallon milk jugs (cleaned) | Free if you save them | Translucent jugs work better than opaque |
| Seed starting mix | Under $10 a bag | Avoid garden soil, it compacts |
| Seeds (hardy varieties) | $2-4 a packet | See flower list below |
| Duct tape or packing tape | A few dollars | For resealing jugs |
| Permanent marker | You probably own one | Label each jug with variety and date |
| Utility knife or scissors | Already owned | For cutting jugs |
Leave the caps off for ventilation; you do not need to save them. Translucent HDPE plastic (recycling code 2) works better than completely opaque jugs because seedlings need light. One jug costs $3-4 new if you buy milk specifically for this, but most gardeners save empties from January through March.
How to Do It
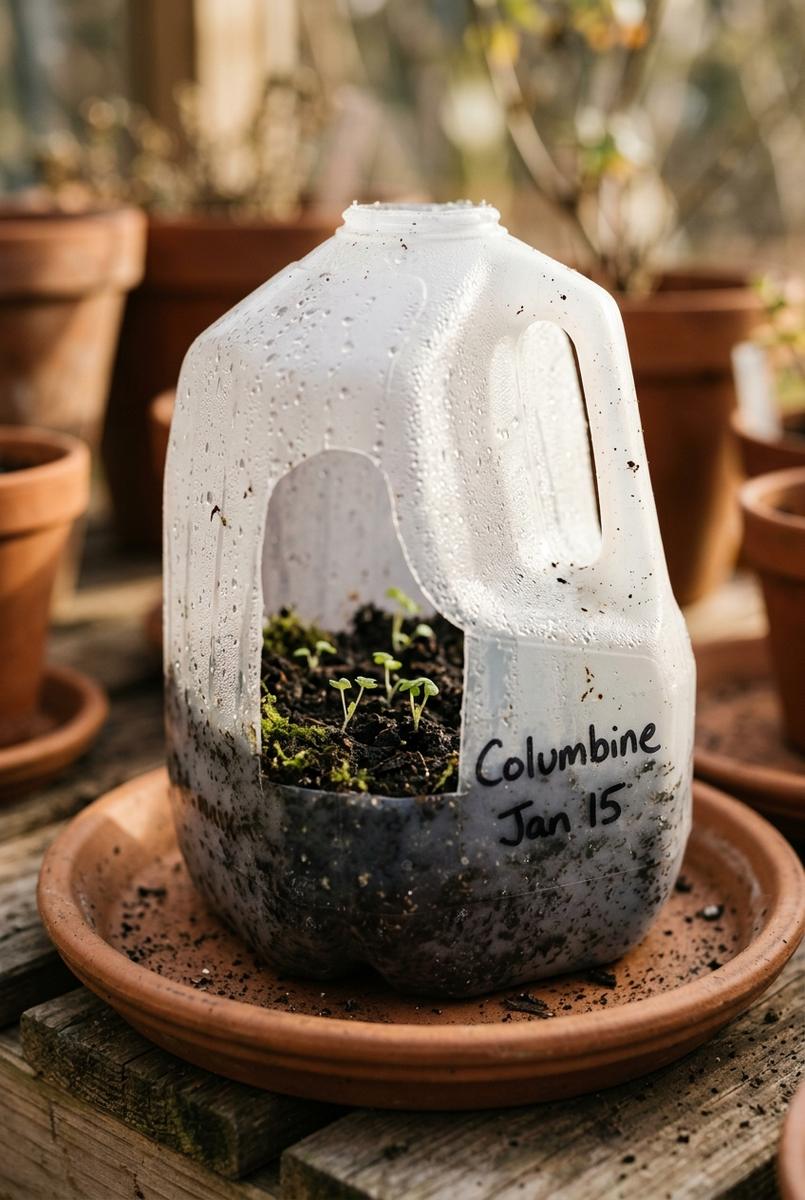
The steps below follow the method University of Minnesota Extension teaches: cut the jug, add drainage and ventilation, moisten the mix, sow, label it inside and out, tape it shut, and set it in a sunny, protected spot where snow and rain do the watering.
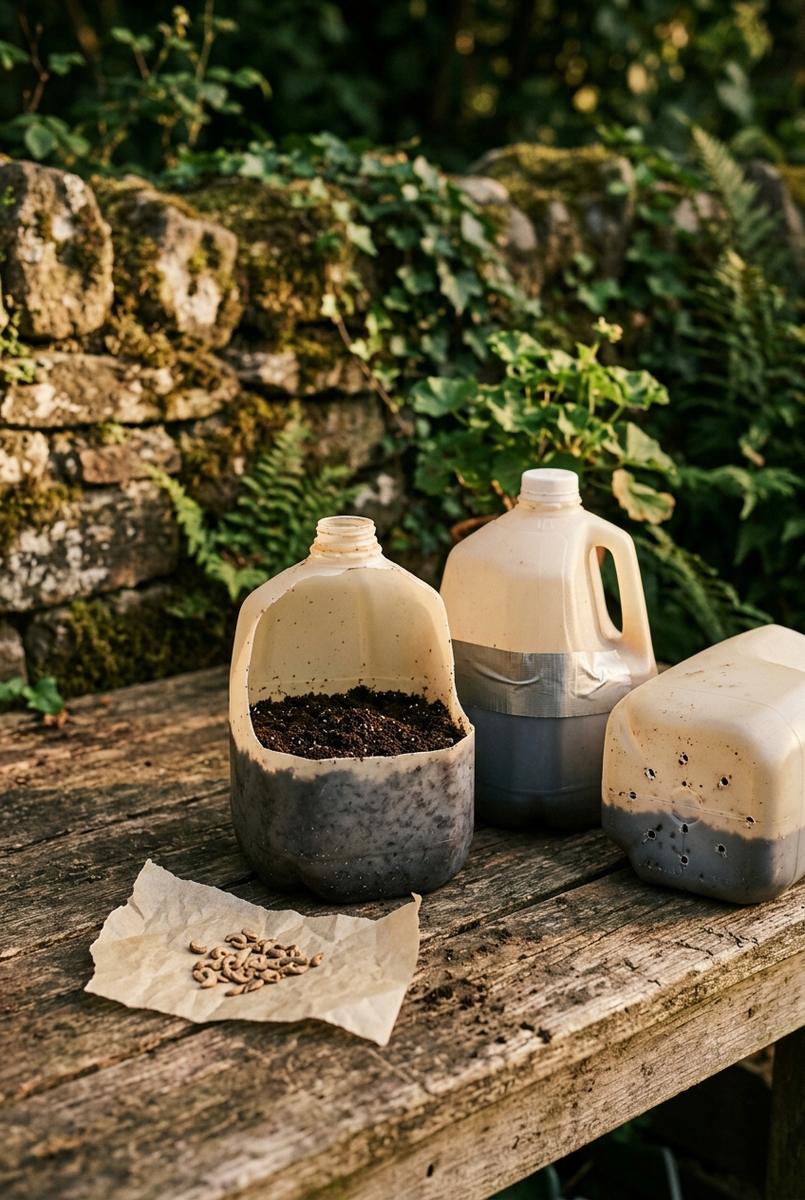
Cut the jug. Use a utility knife to cut around the jug about 3 inches from the bottom. Leave a 1-inch “hinge” on one side so the top stays attached. Make the lower section deep enough to hold the mix without covering the seam.
Punch drainage holes. Use a nail or knife tip to poke 6-8 holes in the bottom. Without drainage, seeds rot.
Add 3-4 inches of seed starting mix. Moisten it before filling the jug. The mix should feel like a wrung-out sponge, not dripping wet.
Sow seeds at normal depth. Light needs vary by species, so check the packet. Seeds that need light get pressed into the surface and left uncovered. Seeds that need darkness, like calendula, get covered with 1/8 inch of mix.
Label with permanent marker. Write the plant name and date directly on the jug. Paper labels fall off or fade.
Tape the jug closed. Use duct tape to seal the cut edge. Leave the cap OFF for ventilation. A sealed jug limits ventilation and can overheat.
Set jugs outside immediately. Choose a protected location with light and exposure to rain or snow. Monitor heat as spring approaches; a warm wall can accelerate overheating.
Quick Tip: Count the packet’s required cold-moist period, rather than counting backward from frost by a universal number of weeks. January is an option in cold-winter climates, not a rule for every location.
Flowers to Consider for Winter Sowing
Choose species native or suitable to your region; a hardiness zone alone does not establish native range or seed-treatment needs.
| Seed group | Examples to research | Packet check |
|---|---|---|
| Native perennials | Purple coneflower, black-eyed Susan, wild bergamot | Species, cold-moist treatment, sowing depth |
| Milkweeds | Swamp milkweed, butterfly weed | Treatment for the exact species and eventual site moisture |
| Other hardy perennials | Columbine, prairie blazing star | Whether the packet calls for pre-chilling |
| Cool-season annuals | Calendula, snapdragon, larkspur | Frost tolerance and local outdoor sowing window |
Cold tolerance and a need for stratification are different traits. Do not assume that all annuals or all varieties of one flower require cold treatment. Outdoor germination follows seasonal conditions, so a fixed indoor days-to-sprout figure is a poor deadline for these containers.
Which Seeds to Winter Sow (and Which to Wait On)
Read the packet for instructions such as cold-moist stratification, fall sowing, or early spring sowing while frosts remain possible. If the instruction is unclear, check the seed supplier’s species guidance before sowing.
Tender plants such as basil, tomatoes, and zinnias need a different schedule. Use indoor seed starting or sow outdoors when local conditions suit the crop. A January jug does not make a tender seedling frost-hardy.
Keeping the Jugs Alive Through Winter
Once the jugs are outside, the job is mostly a weekly walk past them. Here’s what to check.
- Set them where the weather reaches them. Avoid against a covered porch or a spot under an eave, since rain and melting snow are what keep the mix moist. Pick the spot before you sow. Moving a batch of jugs in February is a chore.
- Corral them if your site catches wind. A milk crate can help keep containers upright. It keeps them upright, and it gives you a way to move the whole batch at once.
- Check the drainage holes after a thaw. If water sits on the surface instead of draining through, the holes have sealed with mix or ice. Poke them clear with the same nail you used to make them.
- Read the plastic before you water. Minnesota Extension’s care note is to check for condensation. Fog on the inside of the jug means the mix is still moist. Dry walls mean it’s time to water.
What to Watch For: Overheating and Damping Off
Heat after germination. Keep the cap off from the start. Ventilate by gradually opening the cut top as conditions warm. Pale, stretched seedlings can reflect inadequate light; they are not proof of overheating. Check the actual conditions inside the jug.
No germination yet. Check species treatment, seed viability, temperature, and moisture. A container outdoors may remain dormant for months; six or eight weeks without sprouts does not establish failure.
Seedlings collapse. Remove affected seedlings, avoid saturated mix, and improve ventilation. Iowa State’s damping-off guidance explains this seedling disease. Surface mold alone does not identify the cause.
When to Transplant
Transplant when seedlings can be handled safely, their roots hold the mix together, and the destination is suitable for that species. Gradually open the container beforehand so the plants adjust to unrestricted air, sun, and wind. Use packet spacing rather than one spacing for every perennial.
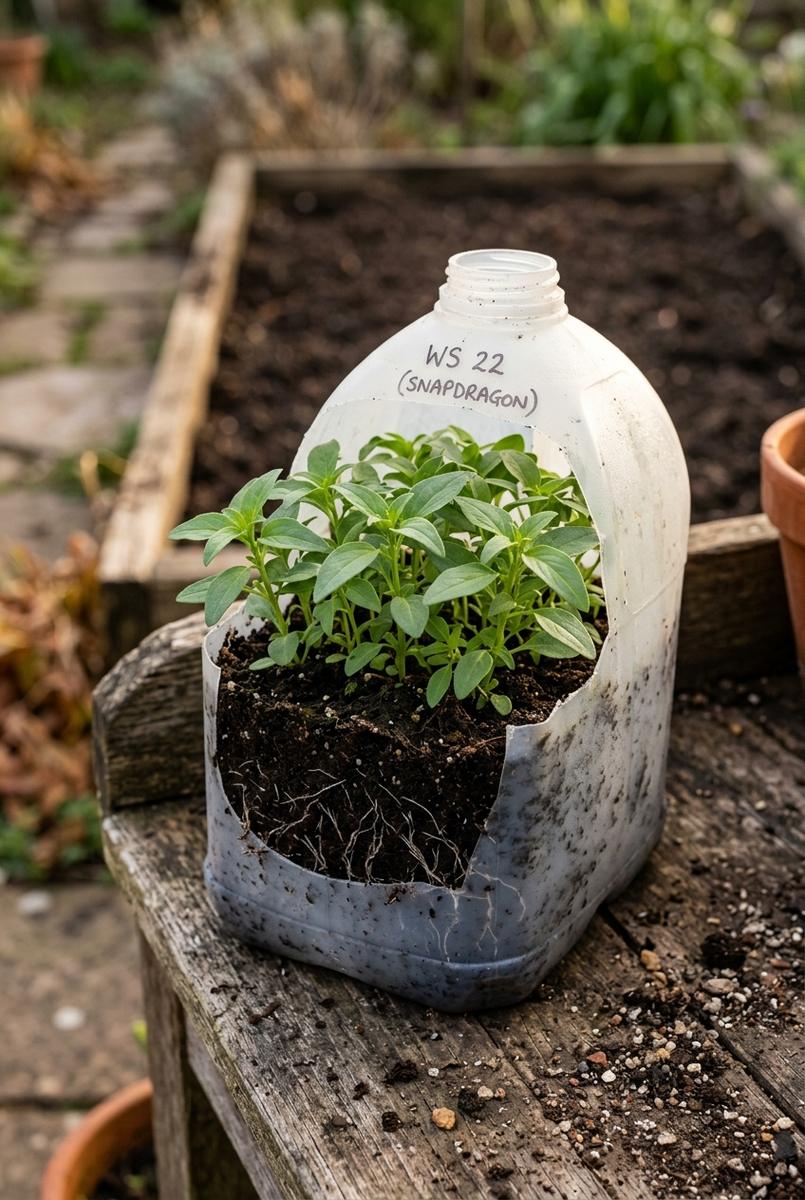
Hardiness zones describe winter minimum temperatures, not spring transplant dates. If a hard freeze is forecast after germination, protect or temporarily shelter vulnerable seedlings according to their species; an unheated plastic jug has no universal safe temperature rating.
Before You Start
Reuse sound containers and start with a few species. Costs depend on seeds, mix, and supplies already available. Inspect jugs for brittleness before reuse, clean them, and replace damaged ones.
Check moisture through winter and more often after seedlings emerge. Water when the mix needs it, allowing excess to drain; a fixed quarter-cup dose will not suit every container. Do not use condensation as the only moisture test. Feel the mix when accessible.
In a mild-winter location, ask local Extension or the seed supplier whether outdoor temperatures supply the required cold treatment. Where they do not, follow the packet’s refrigerator treatment or choose another species.
What to Read Next
- Start seeds in a baggie without soil is the other low-equipment germination trick, for the seeds you want to watch instead of wait on.
- Start a wildflower garden from seed in 5 easy steps is what to do with the seedlings once the jugs come apart.
- Direct-sow flower seeds worth starting in early summer covers the seeds that never needed a jug, and the ones to sow if you missed the winter window.
- Save zinnia seeds next year turns one good plant into next winter’s free seed, which is most of the reason winter sowing is cheap.
- First frost checklist for pots and small gardens is the other end of the same calendar, when the season closes instead of opens.